5.1 Jupyter Notebook
Create Jupyter Notebooks using Amazon Sagemaker
An Amazon SageMaker notebook instance is a machine learning (ML) compute instance running the Jupyter Notebook App. SageMaker manages creating the instance and related resources. Use Jupyter notebooks in your notebook instance to prepare and process data, write code to train models, deploy models to SageMaker hosting, and test or validate your models.
With respect to code, it can be thought of as a web-based IDE that executes code on the server it is running on instead of locally. There are two main types of “cells” in a notebook: code cells, and “markdown” cells with explanatory text. You will be running the code cells. These are distinguished by having “In” next to them in the left margin next to the cell, and a greyish background. Markdown cells lack “In” and have a white background. For further information about SageMaker Notebooks, please visit: Use Amazon SageMaker Notebook Instances
- Navigate to the AWS IoT Analytics console.
- Select Notebooks from the left-hand navigation pane.
- Click Create to begin configuring a new Notebook.
- Click IoTA blank template, click Next. On the next page, input the following:
- Name:
<yourname>_smarthome_notebook - Select data set sources: ‘yourname-streamdataset’
- Name:
- Select the section Create new Instance and enter the following:
- Name:
<yourname>-IoTAWorkshopSagemaker. - Instance type: ‘ml.t2.medium’.
- Create a new Role:
<yourname>-iot-sagemaker-role. - Click on Create Instance.
- Wait until the instance is ready. Click the refresh icon next to the Select a Noteboook instance dropdown. It will be in a pending state…
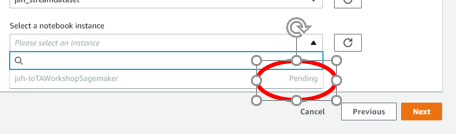
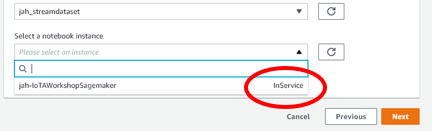
- You may need to refresh every minute to make sure your notebook switched from Pending to InService state.
- Name:
- Once in an In Service state, select your instance from the dropdown and Click Next. Then click Create notebook
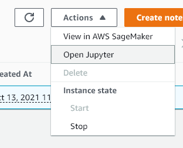
- Click on the radio button next to the notebook you just created. (e.g., yourname-IoTAWorkshopSagemaker). Select Actions -> Open in Jupyter
- Download the following Jupyter Notebook: SmartHomeNotebook.ipynb.
- In the Jupyter Notebook console, click Upload
- Select the SmartHomeNotebook.ipynb notebook downloaded in step 8, then select Upload.
- Click on the SmartHomeNotebook.ipynb to open the file.
- In the menu Kernel, ensure the kernel is set to conda_mxnet_p36.
- You need to give permissions to the ‘iot-sagemaker-role’ to access the ‘Household Power Consumption‘ data set available in Amazon S3, which is similar to the data set simulated in previous sections.
- Navigate to the IAM console.
- Navigate to Roles (On the left pane)
- Search and select the Sagemaker role created in step 5:
<yourname>-iot-sagemaker-role. - On the Permissions tab, click on Attach policies.
- Search and Attach policy
AmazonS3FullAccess.
- Return to the Jupyter notebook in SageMaker. You should see some pre-filled Python code steps in the Jupyter notebook.
- Begin at the top cell, and click Run for each cell. Follow the documentation presented in the Notebook. The Notebook includes information about how the machine learning process works for each step.
- Run through all the steps in the SmartHomeNotebook to understand how the machine learning training process works with Jupyter Notebooks.
- Note: Wait until the asterisk (*) disappears after running each cell. If you click ‘Run’ before the previous step is completed, this could cause some code to fail to complete and the algorithm will fail.